How to set up your guide
03.12.2009 15:01HOW TO SET UP YOUR GUIDE
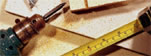
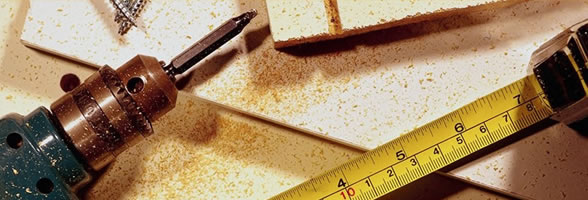
A slot car generally has 3 main points of contact with the track – the rear tyres, the front chassis "skids" and the guide/braids. ( Grand Prix cars its the front wheels touching the ground rather than skids). It is critical that the relationship between the guide and the front skids is correct so that the skids work properly and give the car stability. It is this relationship which I will refer to as guide set-up. If the guide set up is not correct the car will be unpredictable and difficult to drive consistently. When the guide set up is correct the car handling should be stable and predictable, assuming everything else with the car is in order. When racing on different tracks, guide set-up is one of the things that usually needs to be adjusted and it is worth taking time to get this right. First of all there are a few terms to explain: Track recess refers to the relationship between the surface of the track and the top of the track braid or copper tape. It is generally described in thousands of an inch. So, a recess of 10 thou means the top of the track braid is 10 thou below the track surface. If a track is described as "flush" (common with copper taped tracks) it means the top of the braid or tape is level or flush with the track surface. 10 thou (0.25mm) may not sound like much but in slot car terms it is significant. Guide height Guide height is the relationship between the underside of the braids in the guide and the part of the car designed to touch the track at the front. The front of any slot car should be supported by either the front of the chassis, the chassis skids or the front wheels (if fitted). The braids should only touch the track with sufficient pressure to pick up power. If the guide is too low, the front of the car will be too high and the skids or wheels will not touch the track. If the guide height is too high, the braids will not make proper contact with the track braids and power pickup may be lost as the car travels round the track. Guides flags and spacers Guide flags come in various designs but the two main types are “normal” and “cut down”. The photos below shows the difference between them – cut down on the left, normal on the right. Using Cahoza guides as an example, the cut down guide has a base which is 25 thou thinner than the normal guide. This means the cut down guide will sit 25 thou higher than the normal guide when fitted to the same chassis. The selection of guide depends on the following two factors: The guide height is adjusted by the addition or removal of guide spacers. These are very thin washers available in stainless steel and teflon of various thicknesses – typically 5, 10 and 15 thou. Comparing the cut down guide and normal guide, these can be made to give the same guide height by adding a 10 and 15 thou (25 thou in total) spacer to the cut down type. If the guide height cannot be made high enough with a normal guide i.e. it is too low without any spacers, then you need to switch to a cut down type to lift it up and then add some spacers as required to get the right height. FITTING BRAIDS, LEAD WIRES AND GUIDE NUT Lead wires Lead wires have to make electrical contact with the braids and this can be done in two different ways: Externally: External clips are folded pieces of brass shim which are inserted into the braid slot in the guide and bent over the top of the guide. The lead wires are soldered to the top of the clip. Internally: If your guide has lead wire slots cut into the top you can insert a piece of brass shim into the braid slot in the guide and then solder the lead wire to the shim through the slot. Make sure the shim is tinned before fitting and that the shim has a part protruding from the front of the guide to allow removal. In the photos below, the internal method is shown on the left, external on the right. The internal method results in a lower profile guide (the clips are not sticking up above the guide flag) but I normally use external clips made from 10 thou brass sheet – I only use the internal method if I need the lower profile to avoid the clips fouling the body shell. Fitting braids Slot car braids come with clips attached. The clips are folded and inserted into the slots in the front of the guide. It is important that the clips are a tight fit – so tight that they need to be pressed in with pliers. If they are loose or can be pushed in easily by hand there is a risk of them coming out in a crash, losing valuable time. Use of lead wire clips should ensure that braids are a tight fit. Make sure you fold the braid clips by hand. If you press them into a fold with pliers they will be too thin and you will not get a tight fit. When the braids are inserted they need to be folded back under the guide so that they are flat against the sole of the guide. This is done by pressing on the braids and creasing the front fold as shown in the photo below. The only hard and fast fact is that soft braids don't last long and are prone to burning – smear a film of Evostik on the back of the braid and use a braid conditioner to make them more durable and prolong life. Fitting the guide to the chassis The guide flag is fitted to the chassis and held in place with a guide nut. I would recommend using 9mm aluminium guide nuts and getting a suitable wrench – the Hudy tyre wrench has a 9mm hex in the end but other wrenches are available. If you do not have guide post threading tool, make sure you buy your guide flags with threaded posts. Put the guide post through the hole in the chassis guide tab and fit the nut. Be very careful to avoid cross threading – the post in made of plastic and the nut is metal and cross threading is easily done. Tighten the nut fully down onto the guide tab until the guide is tight and cannot turn. Undo the nut a fraction until the guide can turn freely. When the lead wires are fitted the guide should readily self-centre. There should be minimal play between the guide and the guide tab. If you have problems getting the guide to move freely or end up with excessive play between the guide nut and guide tab, check that there is nothing fouling the gap between the guide post and guide tab hole. Also check that there is nothing under the guide tab – sometimes plastic swarf from the threading process can get trapped and cause a sticking guide. Here are a few examples of lead wire routes that provides some self centering action for the guide. There are many photos elsewhere on the BSCRA site showing the various other lead wire routes that can be used on a slot car. Now check that the guide does not stick when turned fully in each direction against the stops. If it does, you need to correct the problem because a sticking guide will double the time needed for a marshal to replace your car after deslotting. Sometimes the flat of the guide can foul on the chassis and jam – you can carefully trim plastic off the guide with a Dremel type tool. A spot of oil lubricates the guide pivot and helps with the self-centering action. SETTING THE GUIDE HEIGHT The best way to set the guide height is by trial on the track, but it does help to get it fairly close off the track first of all. If you have car which is properly set up for your own track and you are preparing for a race on a different track, proceed as follows: If you know the braid recess of your own track then you can work relative to that and this will save you time. Say your track has a 10 thou recess and you are going to be racing on a track with a 15 thou recess. To keep the same relative guide height you need to add a 5 thou spacer to your guide. Add the spacer and then put the car on the track with no body and the rear wheels fitted. Make sure the braids are flat and press down on top of the guide nut – you are checking that the guide and the skids contact the track together so the rear of the car should not lift off the track. If it does lift then your guide is too high (the skids are acting as a pivot) and you need to add more spacers – do this in 5 thou steps until the rear of the car does not lift. Your guide height should now be pretty close to ideal. If your going from a recessed braid track to flush track, you guide will need to be raised by removing spacers. If you have no spacers fitted then you will need to change to a cut down guide and then add spacers to get the right height. As an example – you normally race on a track with a 15 thou recessed braid and you are visiting a track with a flush copper tape. Your guide is a normal type Cahoza with no spacers so you cannot raise your guide any higher. You need to change to a cut down guide – if you use the cut down Cahoza with no spacers your guide will be 25 thou higher. This is 10 thou too much so you need to add a 10 thou spacer and your guide height should be at the correct height. The next test is on the track. Run the car for a few laps and then check the underside of the chassis. You should be able to see rubber from the track collecting behind the chassis skids. Also, the power pick up should be consistent at all parts of the track. This tells you that the guide is set more or less at the correct height. If the car seems to be handling poorly and you know that everything else is healthy then take the guide up by removing a 5 thou spacer and test it again. Some cars are very sensitive to guide height so it can be a bit of trial and error. It is very important, however, that you take the time to get this right. If you notice your car losing pickup (or brakes) at any point on the track, there is a good chance that you have set your guide too high. You need to add spacers (5 thou at a time) to get things right. If you run a car with soft braids and the guide set too high this can cause the braids to burn away fairly quickly. OTHER THINGS TO CONSIDER Hard braids are a bit thicker than soft braids so if you change from hard to soft, you will raise your guide by around 5 thou. Make an allowance for this when adjusting your guide height. Make sure that your guide is level when looking on the front of the car. This can be checked by putting a straight edge under the chassis and checking the gap (by eye) between the guide plate and the straight edge on each side. If the guide is not level it can be twisted by hand on a pressed production chassis. On a chassis with soldered guide tab the problem is a bit more difficult to fix and is probably a result of poor build Make sure that the front skids on your chassis (if fitted) are the same size. If they are not your car will be unstable. Some older tracks have a slightly shallow slot depth. This means the bottom of the guide flag can touch the bottom of the slot and lift the guide off the tape or braid. This can result in loss of power, loss of brakes and poor handling. You may need to trim a bit (1mm is normally enough) of the bottom of the flag to avoid this problem. If a track is a bit bumpy, it may be necessary to lower the guide so that the bumps don't unsettle the car. Whilst this information in this guide is theoretically correct, some cars are quite sensitive to guide set-up. You may find that a particular chassis works best with the front as low as possible. In this case the guide should be set as high as possible without losing pickup from the braids. Stuart Strachan Copyright © 2004 British Slot Car Racing Association All rights reserved No liability is accepted for this information or any use to which it may be put


When the braids are inserted they need to be folded back under the guide so that they are flat against the sole of the guide. This is done by pressing on the braids and creasing the front fold as shown in the photo (left).

The rear of the braid should then be bent down slightly as shown to help contact with the track braid. (see lower left of this photo)

There are two main types of braid available – hard and soft. Hard braids are tightly woven copper strands. Soft braids are less tight. Soft braids provide better conductivity than hard braids and are commonly used on copper taped tracks and lightly recessed braided tracks. Hard braids are much harder wearing and are common in longer races and on tracks with braid a recess of more than 10thou.
 1
1  2
2  3
3
1 Wires tied together about the simplest system, it can be tricky to get this working consistantly : 2 Looped lead wires are a popular way of providing smooth self centering: 3 Wires attached to the chassis with tape - this gives a firmer self centering action than the looped arrangement. 4
4  5
5
4 Wires soldered to a small piece of printed circuit board glued to the top of the chassis: 5 Lead wires clipped to the chassis (4 and 5 provide similar self centering action to 3)
The most important thing is that a car will not work that well on a smooth track with the chassis skids off the track i.e. the guide is set too low and the car is running on the braids only.
—————